Patient Access API Walk-through
Purpose
This document is for third-party accounts seeking access to patient records through an API. The document will walk through account setup and authorization as well as API interactions.
Contents
Client Setup
We have provided a test client to familiarize yourself with the API.
- Download Postman Client
- Download our collection by selecting “Run in Postman”.
Authenticating
The provider can create a bearer token for your account using the developer tools in the EHR and provide it to you. Please contact the provider to obtain this bearer token.
Store this bearer token in the environment variable ‘AuthToken’ in Postman. Then hit the save button.
API Interaction
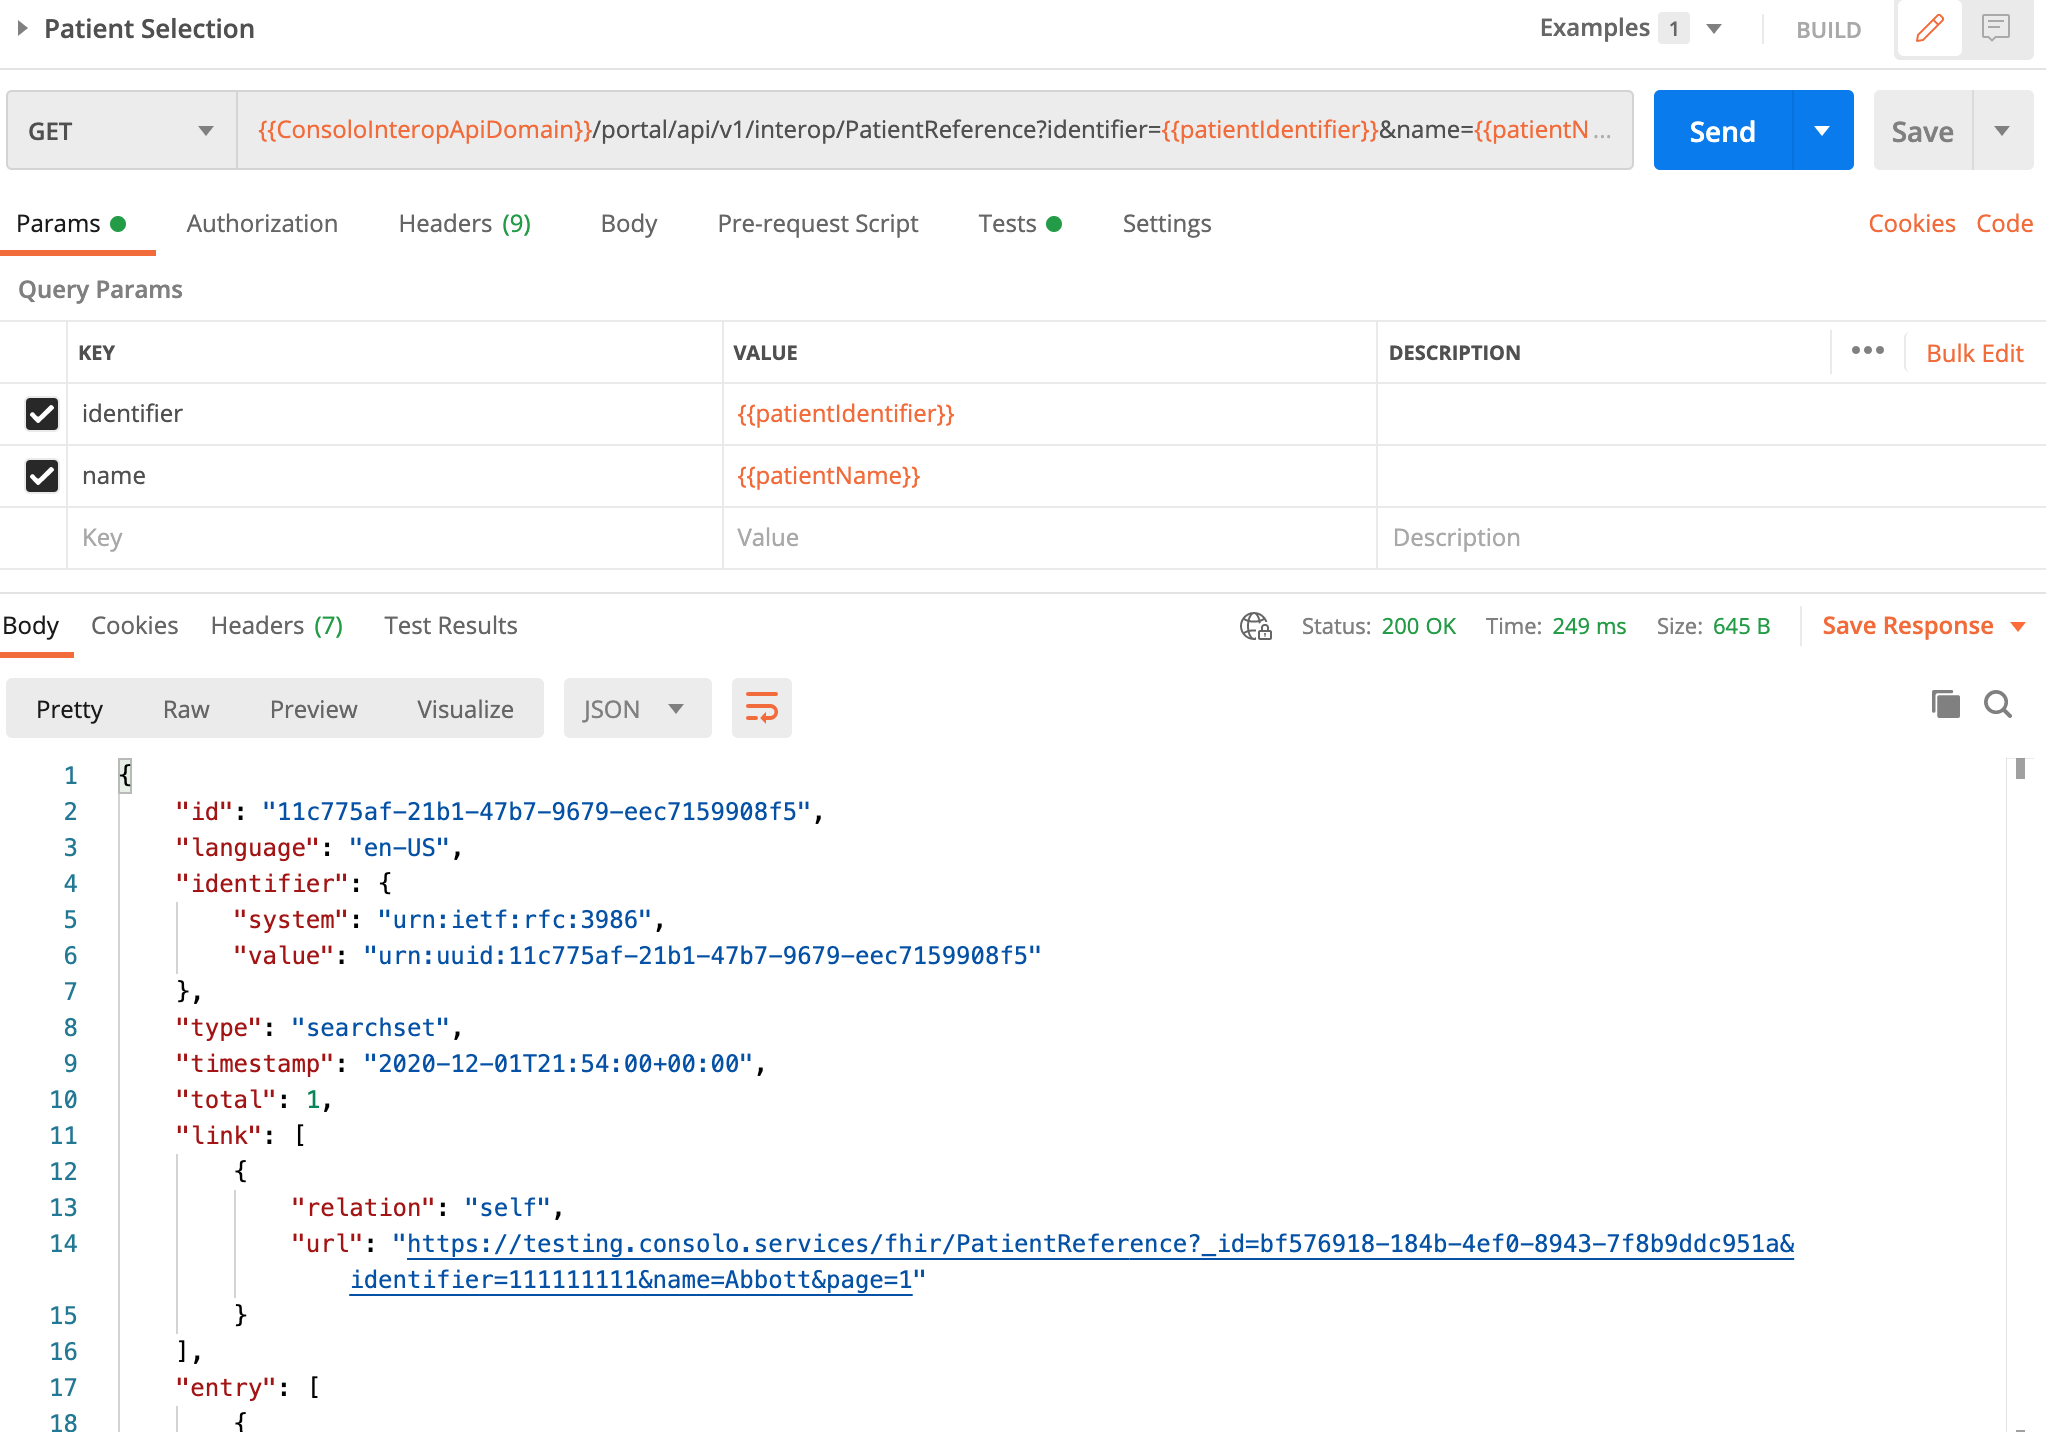
Selecting a Patient
The API client comes with a default configured environment. To select your patient, you will need to update the environment variables in Postman.
- Select “Patient Selection” in the collection list.
- View the environment variables, and select “Edit”.
- Update
patientIdentifierto your patients social. - Update
patientNameto your patients last name. - Press the “Send” button which will then execute your API and retrieve your record.
For more search options please refer to the full API documentation.
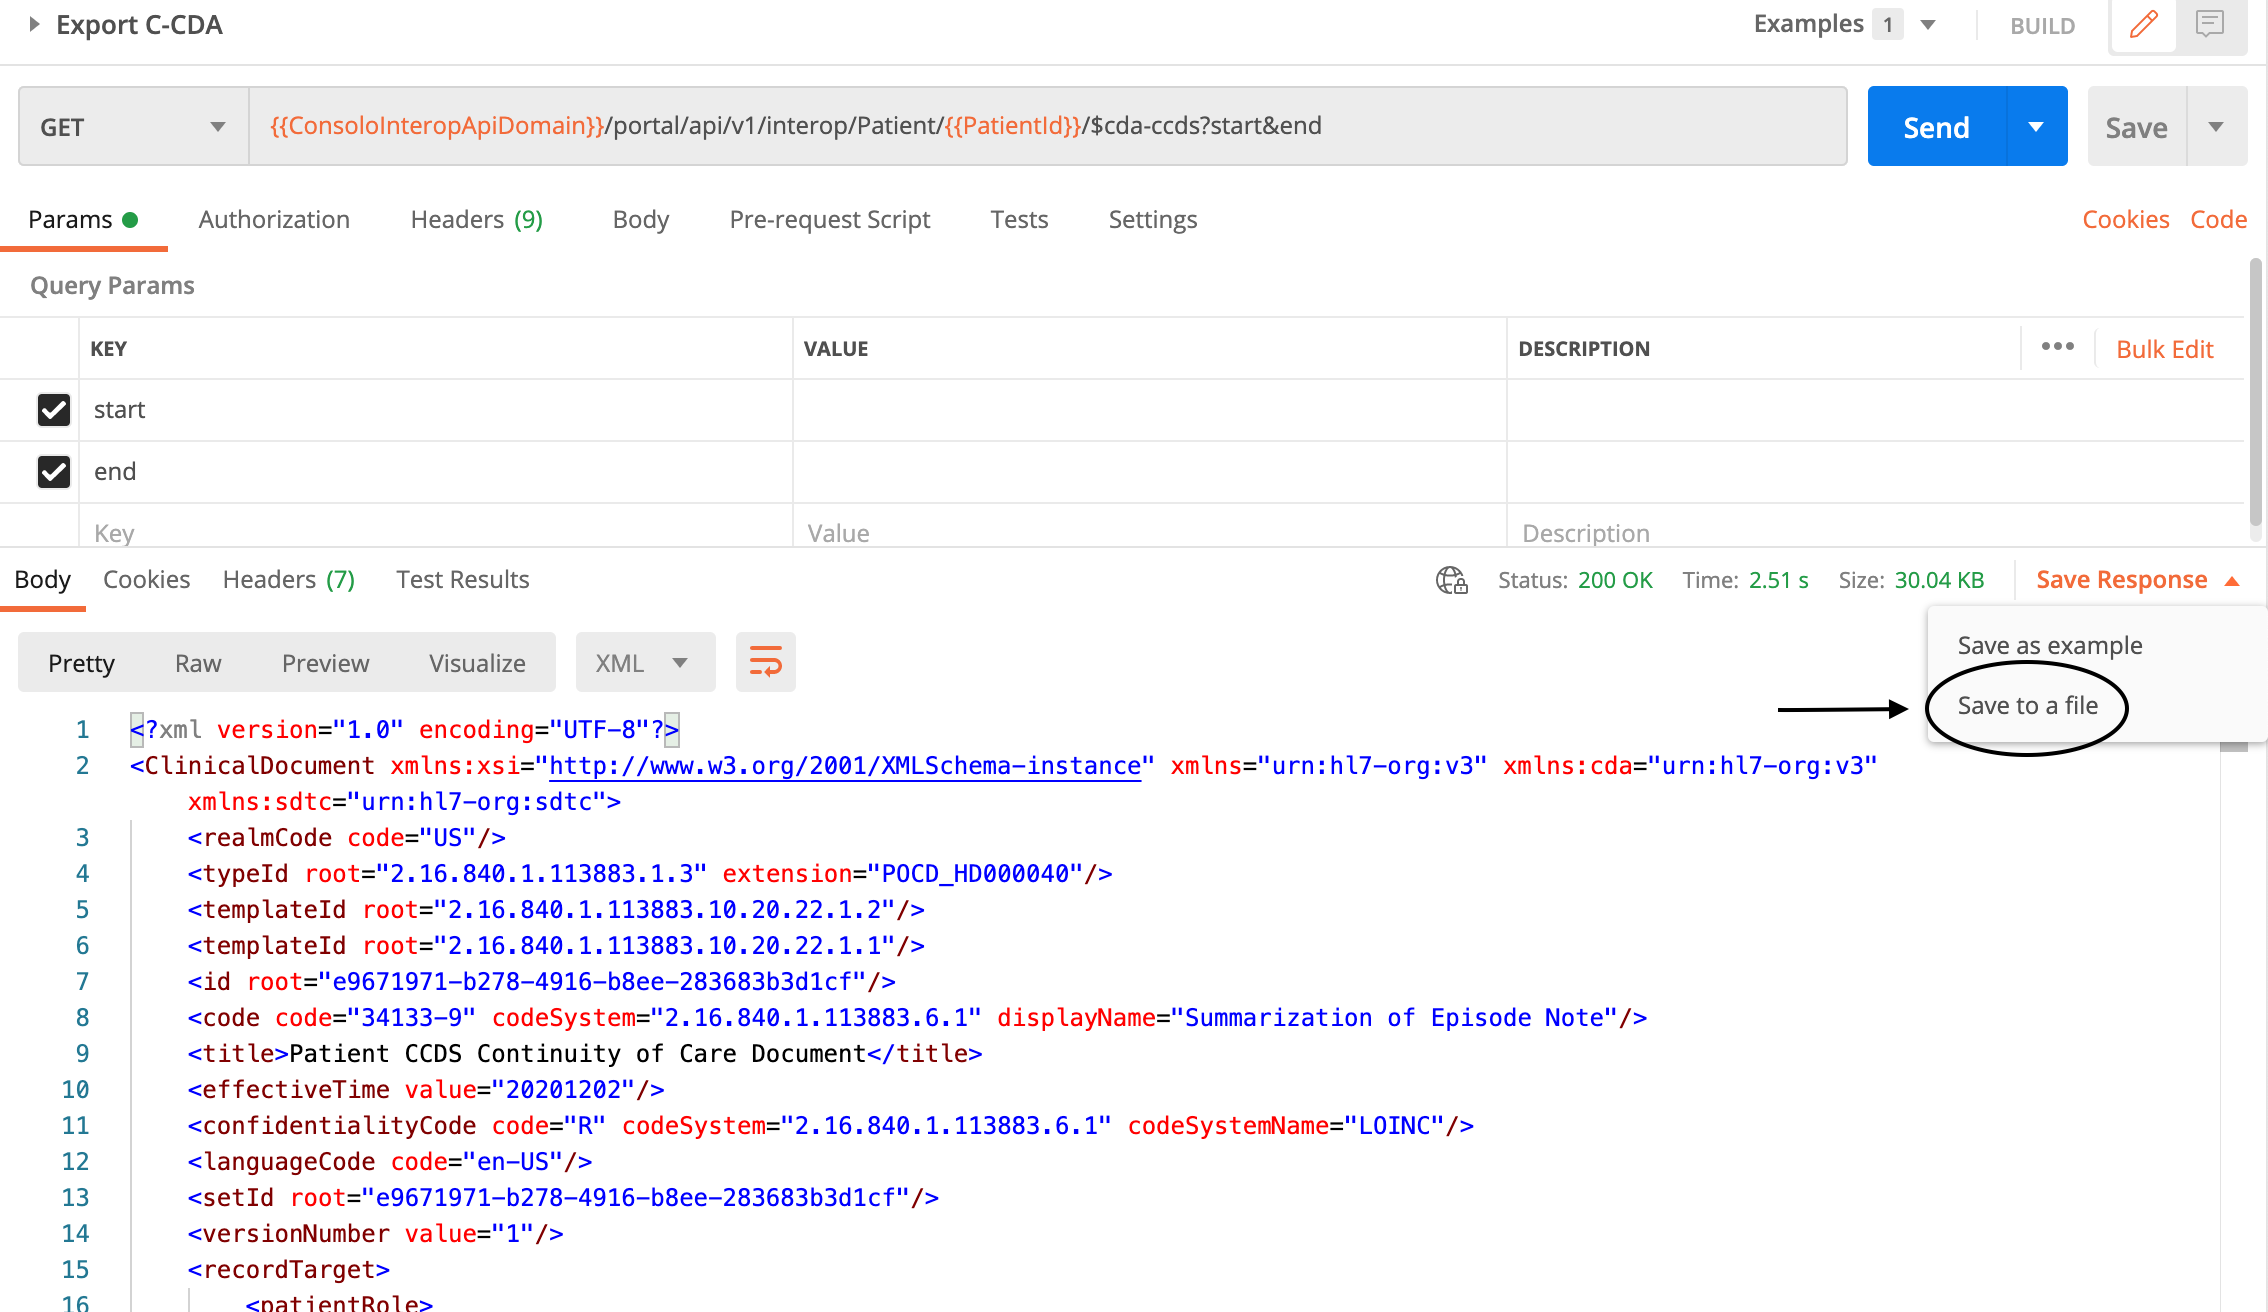
Export a C-CDA File
You may utilize the client API to export a full C-CDA file on behalf of the patient. This record includes all data in the CCDS.
- Select “Export C-CDA” in the collection list.
- Execute the API.
- This will return the C-CDA file in XML format.
- To save the file, select “Save Response” -> “Save to File” in the response section.
For more information on the API, please refer to the full API documentation.